Mandelbrot in Verilog
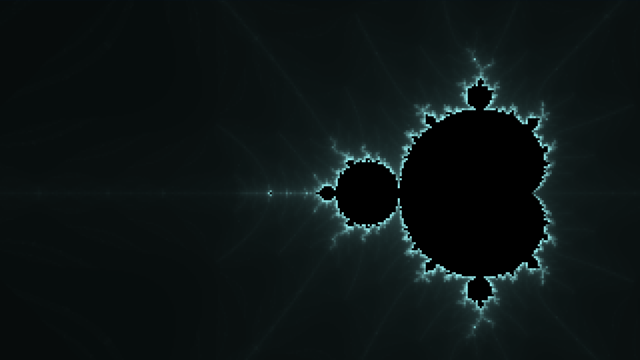
This FPGA demo uses fixed-point multiplication and a small framebuffer to render the Mandelbrot set. You can navigate around the complex plane using buttons on your dev board.
The demo doesn’t run at 60 FPS because it only considers one pixel at a time. I may extend the design in future: it currently uses just 9 of the 740 DSPs on the Nexys Video!
Building the Demo
Find the source and build instructions in the projf-explore git repo:
https://github.com/projf/projf-explore/tree/main/demos/mandelbrot/
The demo is ready to go for:
- Digilent Arty A7-35T
- Digilent Nexys Video
- Verilator/SDL Simulation
It should be straightforward to adapt to any FPGA board with video output.
Demo Structure
- Top module with display interfaces:
- Arty A7-35T with Pmod VGA: xc7-vga/top_mandel.sv
- Nexys Video with DVI: xc7-dvi/top_mandel.sv
- Verilator with SDL: verilator-sdl/top_mandel.sv
- Mandelbrot modules:
- Modules from Project F library:
The Mandelbrot Set
Programmers have long been fascinated by fractals in general, and the Mandelbrot set in particular. I created this demo as an example of fixed-point multiplication in Verilog. The calculation is mundane, yet the resulting images are beautifully intricate.
Interested in the maths? Check out The Mandelbrot Set - Numberphile on YouTube.
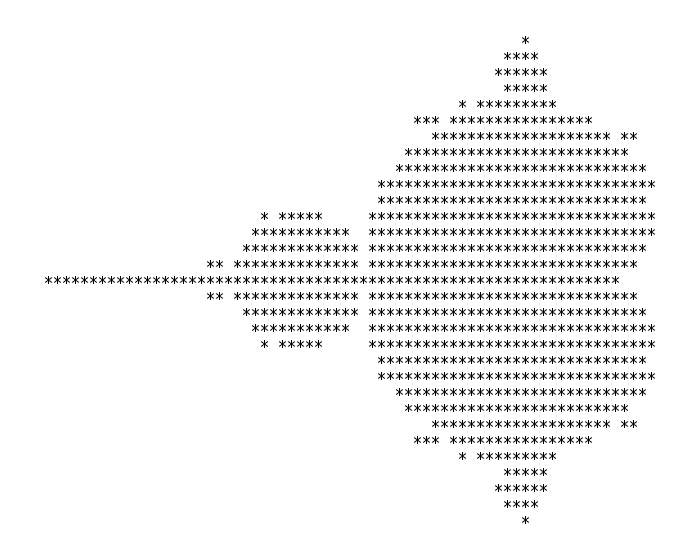
Command-line depiction of the Mandelbrot set, as used by Brooks and Matelski in their 1978 article on Kleinian groups. Recreated by Elphaba in the Public Domain.
Plotting Algorithm
Rendering the Mandelbrot set comes down to squaring and adding complex numbers repeatedly. For this demo, I’ve used the optimized escape time algorithm as described on Wikipedia.
I’ve divided the rendering into two: mandelbrot.sv checks to see if a coordinate is in the Mandelbrot set, while render_mandel.sv sets up the coordinates and handles supersampling (discussed below).
We use 25-bit fixed-point numbers with Q4.21 precision: 4 integer and 21 fractional bits. This precision fits well with the capabilities of the Xilinx 7 Series DSP.
We’re rendering at a resolution of 320x180. The starting position (top-left corner of the image) is (-3.5, -1.5i) with a step of 1/64 (0.015625). So, the last pixel (bottom-right corner) is at (1.5, 1.3125i). Note that the Y-axis (imaginary part) increases down the screen.
With 25-bit precision and 4 bits reserved for the integer part, you can zoom in 15 times to a minimum step of 1/221. You can adjust the precision by changing FP_WIDTH in the top module (don’t forget to adjust X_START, Y_START, and STEP to match the new width).
We consider up to 255 iterations by default, but you can adjust this by changing ITER_MAX in the top module. The minimum number of iterations supported is 128, but you get the best results with 2n-1, for example, 511, due to the way colours are rendered (discussed below).
Fixed-Point Multiplication
I’m using the mul.sv module from our Verilog library. This module requires three cycles and isn’t pipelined.
Fixed-point multiplication is the same as integer multiplication, but we must select the correct bits from the result. Having a multiplication module relieves you of the hassle of handling all the vector slices and the need to consider rounding.
I plan to implement a pipelined version of fixed-point multiplication before too long, which should significantly speed up the Mandelbrot calculation.
You can find details of the cocotb test bench for the mul module in the maths README.
Mandelbrot Rendering
The rendering module render_mandel.sv drives the rendering process, leaving the video display to the top module.
- Determine the coordinate of a pixel
- Select four samples within the pixel (supersampling)
- Run the Mandelbrot calculation module for each of the four samples
- Take the mean number of iterations from the four Mandelbrot calculations
- Turn the mean iterations into an 8-bit colour index (0-255)
- Repeat the process for the next pixel
Colouring the Output
We get an 8-bit value for each pixel, but what colour should we display? We could use a palette and colour lookup table, but I’ve decided to directly calculate the colour. I’ve included two colour schemes controlled by the COLR_SCHEME parameter:
COLR_SCHEME = 0: blue > purple > gold colour schemeCOLR_SCHEME = 1: simple scheme with shades of blue-green (cyan)
Try experimenting with your own colours or linking the colour scheme to a switch on your dev board.
logic [FB_DATAW-1:0] mandel_r, mandel_g, mandel_b;
always_ff @(posedge clk_pix) begin
    if (COLR_SCHEME) begin
        mandel_r <= (lb_colr_out >> 1);  // reduce red by a factor of two
        mandel_g <= lb_colr_out;
        mandel_b <= lb_colr_out;
    end else begin
        if (lb_colr_out == 0) begin  // black in the set
            mandel_r <= 'h00;
            mandel_g <= 'h00;
            mandel_b <= 'h00;
        end else if (lb_colr_out <= 8'h66) begin  // blue then purple
            mandel_r <= 'h00 + lb_colr_out;
            mandel_g <= 'h00 + (lb_colr_out >> 1);  // divide by 2
            mandel_b <= 'h33 + lb_colr_out;
        end else begin  // turning to gold
            mandel_r <= 'h66 + lb_colr_out - 'h66;
            mandel_g <= 'h33 + lb_colr_out - 'h66;
            mandel_b <= 'h99 + 'h66 - lb_colr_out;
        end
    end
end
Resolution
To change the render resolution, you need to adjust the following in top_mandel.sv:
- The rendering step parameter:
STEP - The framebuffer dimensions:
FB_WIDTHFB_HEIGHTFB_SCALE
- The zoom scale factors:
x_start_p <= x_start - (step <<< 7);y_start_p <= y_start - (step <<< 6) - (step <<< 5);x_start_p <= x_start + (step <<< 6);y_start_p <= y_start + (step <<< 5) + (step <<< 4);
Supersampling
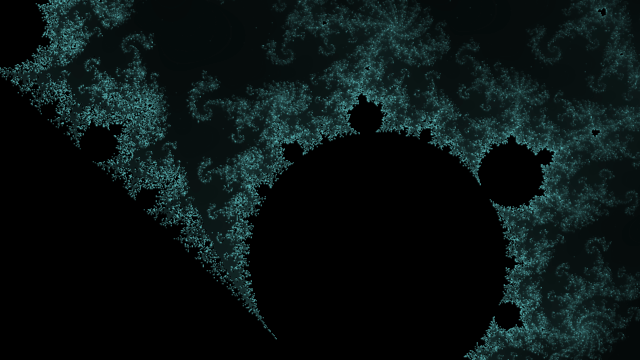
At the set boundary, we’re switching from a bright colour for a large but finite number of iterations to black for max iterations. With a single sample per pixel, this results in an unattractive, ragged boundary:
We get a much better result if we sample four points per pixel; this is a form of supersampling:
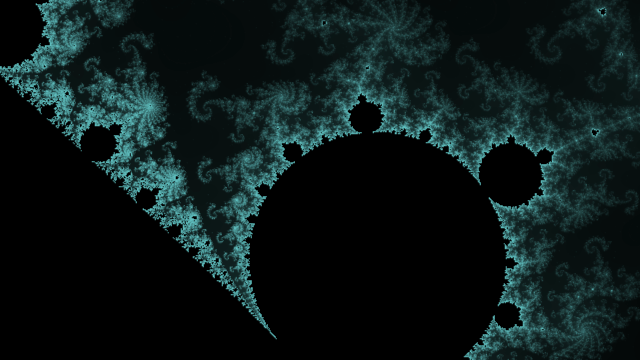
We generate four coordinates within the area of each pixel in the INIT step of the finite state machine in render_mandel.sv.
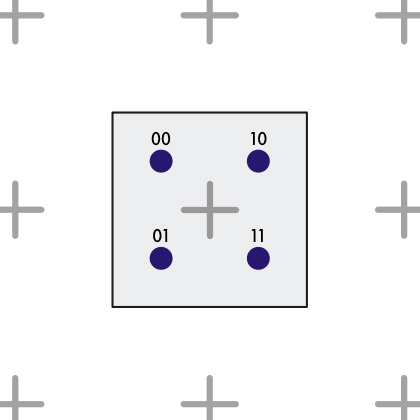
The centre of each pixel is marked with a cross. The four samples are taken in a grid around the centre.
always_comb begin
    fx_left   = fx - (step >>> 2);
    fx_right  = fx + (step >>> 2);
    fy_top    = fy - (step >>> 2);
    fy_bottom = fy + (step >>> 2);
end
The area covered by each pixel is step x step. The four samples happen one-quarter of a step before and after each pixel’s central coordinate. (step >>> 2) is equivalent to dividing by four. We use the arithmetic right shift “>>>” because the coordinates are signed.
We pass the sample coordinates to four instances of the Mandelbrot module, so the four samples happen simultaneously; see the second half of render_mandel.sv.
ProTip: shift operators have low precedence, so I recommend enclosing them in brackets.
DSP Usage
Each Xilinx 7 Series DSP block (DSP48E1) can multiply 25 × 18 bits.
The DSP usage of each Mandelbrot module instance depends on FP_WIDTH:
- 18 bits = 1 DSP (zoom 8 times)
- 25 bits = 2 DSPs (zoom 15 times)
- 28 bits = 3 DSPs (zoom 18 times)
- 32 bits = 4 DSPs (zoom 22 times)
18-bit fixed-point only leaves 14 bits for the fraction, so you can’t zoom in far, but it’s frugal with DSPs. 25 bits is a good compromise as it provides a decent zoom level without consuming too many blocks. Above 25 bits, DSP usage rises quickly.
This demo uses four Mandelbrot module instances for supersampling, plus one DSP is used in address calculation. Thus, the total number of DSPs with 25-bit precision is: 4 * 2 + 1 = 9. There are 90 DSPs on the Artix-7 35T and 740 on the Artix-7 A200T.
Learn more from Multiplication with FPGA DSPs.
Future Improvements
I plan to return to this demo later:
- Explain the maths behind Mandelbrot
- Pipelined multiplication
- Render multiple pixels at once
- Add support for ULX3S
- Simplify related scale settings: framebuffer size, step, and zoom factors
What’s Next?
I have tutorials on both Framebuffers and Fixed-Point Numbers if this demo has whetted your appetite.